Structural Design Patterns #02 - Bridge

This post is going to cover the bridge pattern. The adapter pattern in the previous post is more used to fix an occurring problem whereas the bride pattern is more used to avoid a problem.
The problem
Let's continue with the example from the first post. We are working in a company that produces parts for the automotive sector. At the end of our production line, we have cameras that make photos and an AI decides based on the photo if the quality standards were achieved. Our company has different production lines and every production line uses a camera. Let's say we now want to model the production line, if we only create one abstraction our structure could look like this:
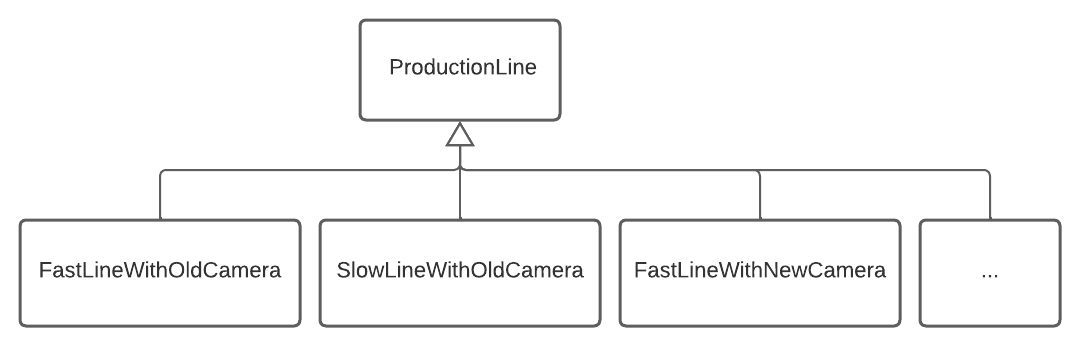
If we wanted to support all combinations of production lines and cameras the number of subclasses would equal the number of cameras times the number of production lines. Currently, we want to support 3 production lines and 4 cameras so we would need to create 12 classes. Additionally, some subclasses would contain the same code as their siblings. If we want to change the implementation of the OldCamera for instance we would need to change multiple classes. The overarching problem with this structure is that we have coupled an abstraction with the implementation. In this example we can create two abstractions:
Abstraction of a production line (ProductionLine)
Abstraction of a camera (currently coupled with our implementation)
The solution
The goal of the bridge pattern is to decouple an abstraction from its implementation. To decouple the abstraction we need to create another abstract entity that represents the abstraction. If we apply the bridge pattern to the example we will have the following structure:
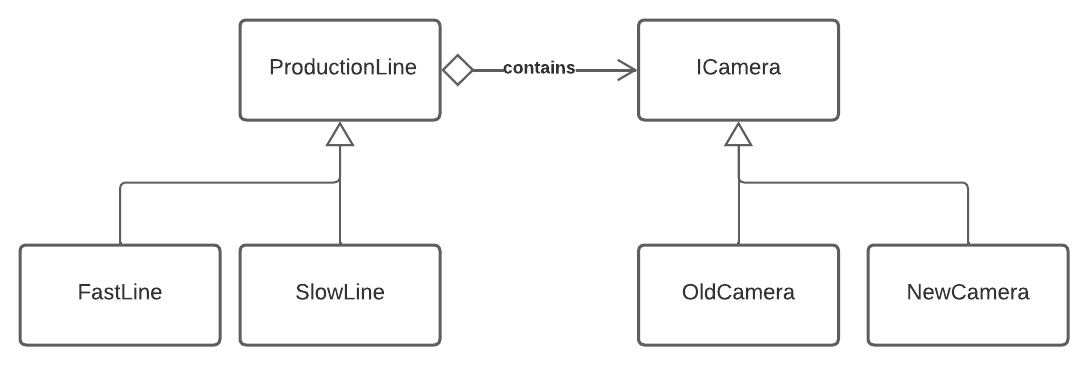
With this structure, we now can easily combine every production line with every camera and the number of subclasses only equals the number of production lines plus the number of cameras. If we are modeling 3 production lines and 4 cameras this would equate to 7 classes instead of the 12 mentioned before. Additionally changes to the OldCamera only need to be made in one class. To end the post let's translate the most important elements from the UML diagram to some code:
abstract class ProductionLine
{
    ICamera camera;

    ProductionLine(ICamera camera)
    {
        this.camera = camera;
    }

    [...]
}

class SlowLine : ProductionLine
{
    [...]
    camera.MakePhoto(500, 3, 0.4);
    [...]
}

class FastLine : ProductionLine { ... }

class OldCamera : ICamera { ... }
class NewCamera : ICamera { ... }

class BusinessLogic
{
    [...]
    ProductionLine productionLine = new FastLine(new OldCamera());
    [...]
}
That's it for this post, I hope you could learn something! Additionally, if you want to get informed about future posts: sUbsCr1be t0 mY n3wslet1er!1


